Back Taper Sanding jig

Having long back tapers on shafts is well known to be a performance enhancer on wooden arrows.

Many commercial shaft manufacturers, including ourselves, offer back tapering as a service.
However, one of the greatest attractions to this passion of ours, is generating our own independence, building our own tools and jigs, and taking ownership of as much of the building process as we can.

In our factory, we  use our own  semi automatic, custom designed taper machines to be able to maintain a reasonable level of productivity within very tight tolerances. This taper jig here wont be as fast, but it is very accurate, infinitely adjustable, and costs only pennies on the dollar when compared to our custom made beasts!

Now obviously you can modify and improve on the the design,  upgrade materials with hardwoods and  fancier fittings etc. However, the concept behind this tutorial, is to offer an economical and  easily constructed jig,  made from readily obtainable materials . Or if you are lucky enough to have odds and ends laying around your shop, then this may give you the opportunity to construct this jig with no or very little cost!

In fact, the jig is so affordable, simply build a few of them for different taper sizes and taper rates, that way you wont have to re-adjust them every time!

Happy building!

Materials required:

1 x 8′ length of 2×4 or 4 x pieces 16″ long

10″ x 20″ piece of 1/2″ thick plywood

4″x 36″  sanding belt- 60 Gr is a good start

4 x 1″   x 1/4″ bolts

4 x 3″  x 1/4″ bolts

5/16″ drill bit

8 x  1/4″ T nuts ( with the spikes on)

1 tin of cat food- cat optional extra!


STEP ONE.

 Split the sanding belt in half.

Start a cut from the fabric side of the belt with a sharp knife. 

Split the belt by hand carefully and slowly.  The belt will tear square, but try not to pull against the lineal threads of the belt.


STEP TWO.

Rip the 2×4’s into a 2″ wide piece. S that you now  have a piece that is  1.5″ thick and 2″ high

Cut the length  into 4 x 15 1/2″ long pieces.

STEP THREE.

I used a cat food tin with a diameter of about 2 1/2″. This diameter is not absolutely critical , but I found that diameter worked about the best.

Mark the radii on all the ends , on the 1 1/2″ side.

Cut and finish the marked radii. 

A bandsaw  and a bench sander are ideal, but a hand saw and a good rasp will do the job just as well. 

Try and keep everything  nice and square.

STEP FOUR.

Now,  make two centered marks 3″ from either end on the 2″ wide sides. Do this only on 2 of the 4 pieces.

Drill 5/16″ holes on those marks. DO NOT go right through the wood, but rather only drill about  3/4″ deep.

Put a T nut in each of the holes. 

T nuts  can be pressed in with a bench vise, or can simply be tapped in with a smooth faced hammer.

STEP FIVE.

Thread  a 1″ bolt into the T nuts. Mate this wooden piece up with one of the two pieces of wood that dont  have T nuts inserted.

Place the two pieces of wood on a flat surface, and slip the sanding belt over the two parallel wood pieces.

Turn the bolts out, so that they push the pieces apart from each other, and in turn snug up the sanding belt.

NOT too tight, just snug enough! You dont need to crank the bolt heads into the opposing piece of wood, but you do want the belt tight and everything nice and square!

STEP SIX.

Make 4 “retainer tabs” , and drill a 5/16″ hole in each one.

You can simply just rip a piece off of the left over 2×4. Make the tabs 1 1/2″ wide , 4″ long and about 1/4″ thick.

STEP SEVEN.

Now for the Base.

Cut a 10″ x 20″ piece of 1/2” plywood.  Make sure its a nice flat piece.

Draw a center line down the length of the plywood, with a pen of sorts. This centerline will be used to measure the bolt holes off, and will be used to orientated the two sanding platens to generate the ideal taper rate!

Mark the holes according to these measurements. These measurements need to be accurately marked, and drilled nice and square!

Press the remaining 4 T nuts into the holes from the bottom of the piece of plywood.

FINAL STEP.

Now simply assemble  the unit!

Well done, now you can get started with  tapering your own shafts!

Using your taper jig.

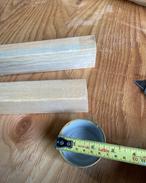
Set up your ” Taper rate”  using two scrap pieces of appropriately sized pieces of wood. you can either use two dowels, or simply cut two slats of scrap wood to the desired thickness.

One of them being the size of the shafts, and the other being the desired finished end of the taper.

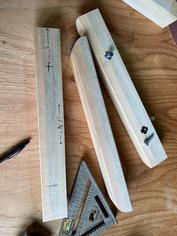
I like to leave the small piece clamped within the jig as an end stop.

If the end piece is too thin, add a layer or two of masking tape, if its too thick, a little sanding will fix that.


You will need to run a few scrap dowels into the jig, to make sure that you have everything set up right, before you run a premium grade shaft into it.

Feel free to call us, we can send you free CULL shafts that are perfect for this use!!

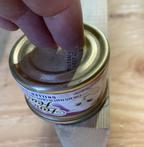
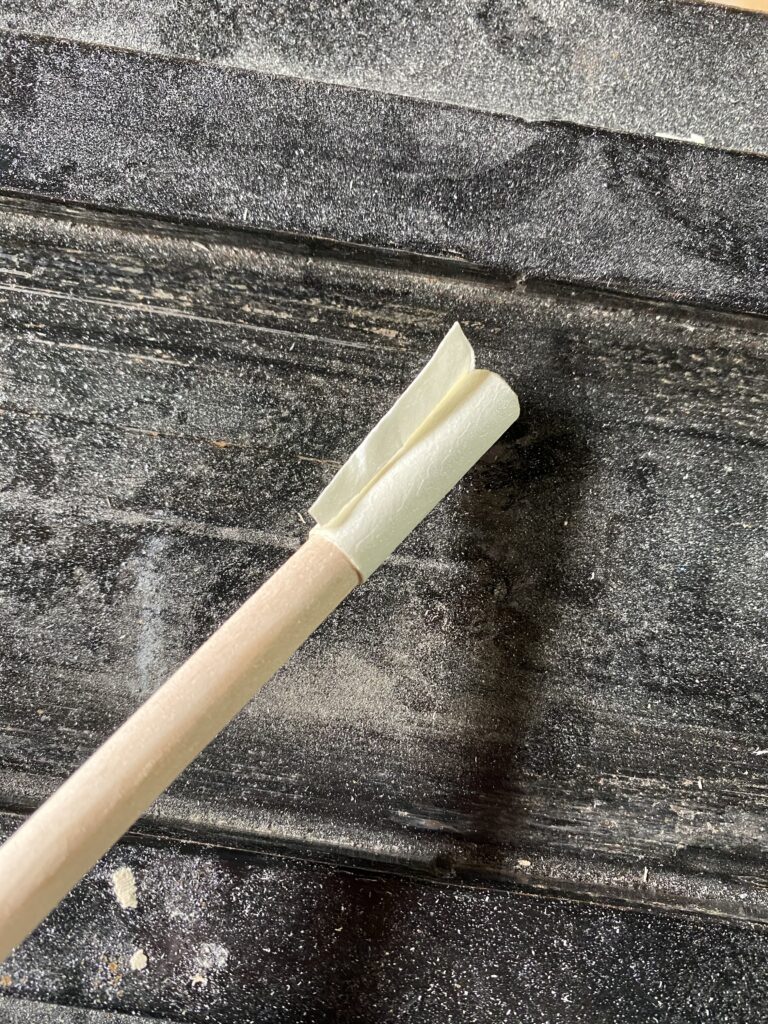
I have found the simplest and most economical way to attach the dowel to the drill, is to wrap the last 3/4″  of the dowel in a piece of masking tape that ends up being about 5 layers thick.

Put this end directly in the chuck, and tighten it so that the Jaws press firmly into the masking tape wrap.

The masking tape provides grip for the jaws, and helps prevent the dowel from being severely damaged.

You can reuse the same piece of masking tape for 4 shafts quite easily.

TIP: leave a small folded tab on the end of the tape, it will make it a lot easier to remove and reuse the tape!

Set your drill for max RPM, and start to feed it slowly into the jig. High RPM and slow feed rate are the secrets to a good finish.

 If the dowel stops spinning and jambs into the jig, you were simply either feeding it too fast, or didn’t have the drill chuck tightened securely enough!

Usually too high of a feed rate will cause the majority of the jambs!!

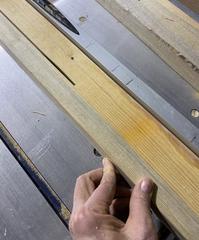
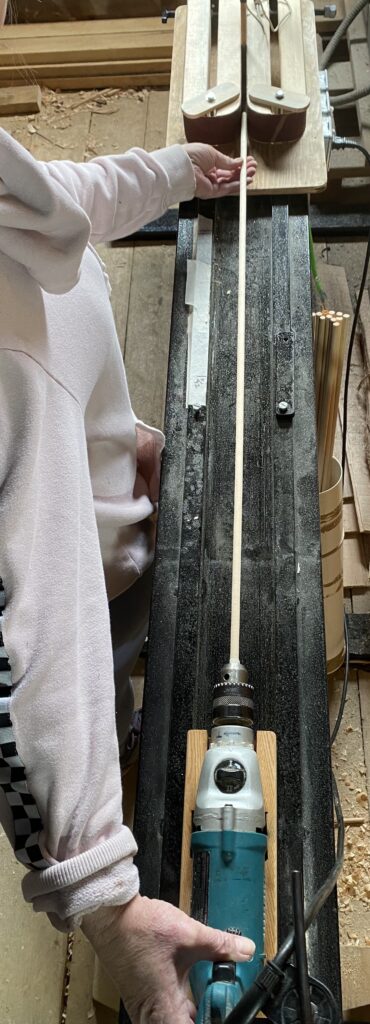
I like to hold the drill with one hand, then support and guide the shaft with my other hand. With my support hand right at the point where  the dowel enters the jig. That is in fact,  the reason for  the jigs platform extending out the front a bit.

Attaching the jig to one end of a  5′ piece of 2×6, will give you a platform to slide the drill along with one hand, while the other hand supports the dowel at the infeed into the taper sander.